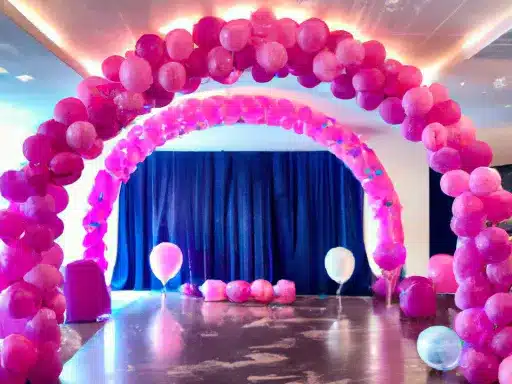
What are balloon arches?
Balloon arches are decorative structures made by arranging balloons in an arch shape. The balloons are usually filled with air or helium and then attached to a frame or structure to create the desired arch shape. Balloon arches are often used as decorations for special events such as weddings, birthday parties, and corporate events, as they can add colour and excitement to any space. They come in a variety of shapes and sizes and can be customized to match the theme or colour scheme of the event.
How to make a balloon arch
Step-by-step guide:
- Decide on the size and shape of your balloon arch. You can choose from a classic half-circle shape or get creative with different shapes such as a heart or star.
- Choose your balloon colours and inflate them to the desired size using a balloon pump. It’s best to inflate them all to the same size for consistency.
- Cut the balloon decorating strip to the desired length of your arch. You can cut it to match the length of the space you want to decorate or make it longer for a more dramatic effect.
- Begin attaching the balloons to the decorating strip by inserting the tied end of each balloon into one of the holes in the strip. You can attach the balloons in any pattern or colour sequence you like. You may need to adjust the spacing between balloons as you go along.
- Once you have filled the strip with balloons, adjust the positioning of the balloons as necessary to create the desired shape.
- Once you are happy with the shape of your balloon arch, tie a piece of fishing line or string to each end of the decorating strip to hang it up. You can use command hooks or tape to secure the fishing line or string to the wall or ceiling.
- Finally, trim any excess balloon decorating strip and fishing line or string.
Your balloon arch is now complete and ready to be used as a party decoration or photo backdrop!
What materials are required for a balloon arch?
To make a balloon arch, you will need the following materials:
- Balloons – You’ll need enough balloons to create the arch. The number of balloons will depend on the size of the arch you want to create.
- Balloon pump – A balloon pump will make inflating the balloons much easier and faster. You can also inflate the balloons with your mouth if you don’t have a pump.
- Balloon decorating strip – A balloon decorating strip is a long plastic strip with evenly spaced holes to thread the balloons through.
- Command hooks or other hanging materials – You will need to hang the balloon arch somewhere, so you will need something like a command hooks or fishing line to hang it.
- Scissors – You will need scissors to cut the balloon decorating strip and trim the ends of the balloons.
- Optional: greenery or other decorations – You can add greenery, flowers, or other decorations to the balloon arch for a more personalized touch.
Tips for creating balloon arches
- Determine the size and shape of your arch: Before you start, decide on the size and shape of your arch. Do you want a classic half-circle shape or a more elaborate design? Consider the location and purpose of the arch, as well as the number of balloons you have available.
- Choose your balloons: Select balloons in the colours and sizes you want for your arch. Consider using different shades of the same colour or complementary colours for a visually appealing effect. Make sure to have enough balloons to fill the arch.
- Inflate the balloons: Inflate the balloons to the desired size using a balloon pump or helium tank. Make sure to inflate all the balloons to the same size for consistency.
- Attach the balloons: There are a few different ways to attach the balloons to the arch frame. You can tie them directly to the frame, use balloon tape, or use a balloon decorating strip. For a sturdy arch, use a frame made of PVC pipe or metal conduit.
- Assemble the arch: Start assembling the arch by attaching the balloons to the frame. Work your way around the frame, alternating colours and sizes to create a pattern. Use a variety of techniques, such as twisting the balloons together, to create different shapes.
- Adjust as needed: Once you have attached all the balloons, step back and evaluate the arch. Adjust the balloons as needed to create the desired look. You may need to add more balloons or move them around to achieve the perfect shape.
- Secure the arch: Finally, make sure the arch is securely attached to its base. If you are using a freestanding frame, make sure it is weighted down to prevent it from tipping over. If you are attaching the arch to a wall or other surface, use strong adhesive or brackets to keep it in place.
With these tips, you should be able to create a stunning balloon arch for any occasion!
Looking for more balloon ideas? Check out our Birthday Balloon gift ideas page.


